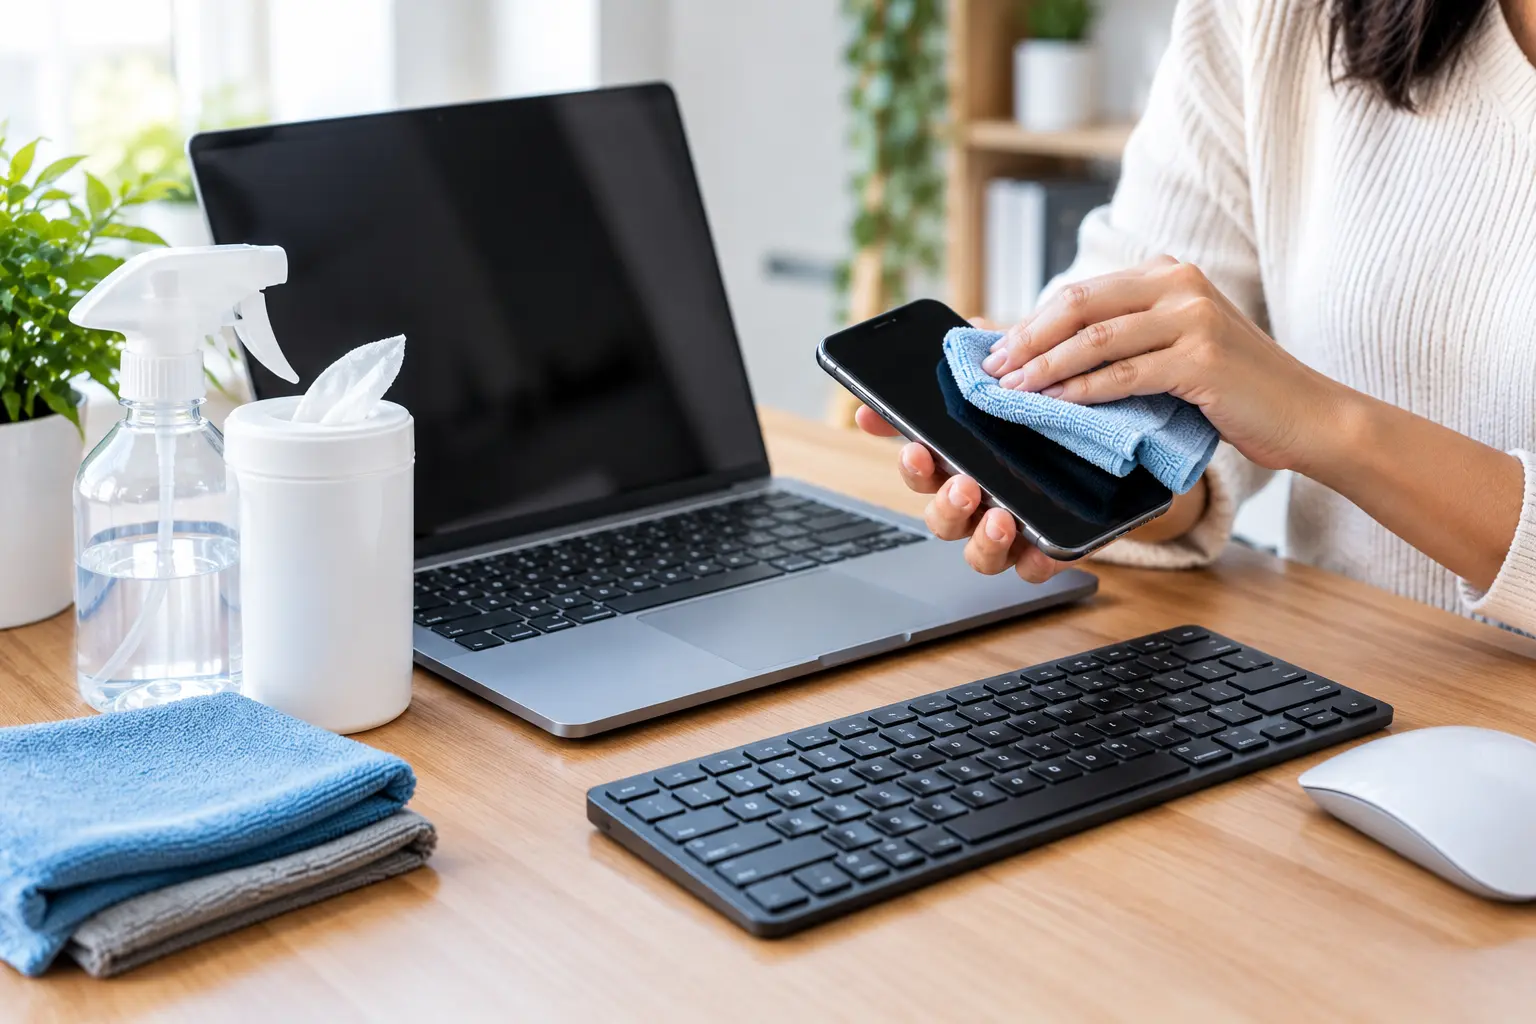
Phones, laptops and keyboards collect dirt every day. Dust settles between keys. Fingerprints cover screens. Oils build up on phone cases and touchpads.
Regular cleaning helps keep your devices looking fresh. It can also reduce the spread of germs from frequently touched surfaces. However, electronics need careful handling. Using too much liquid or the wrong cleaner can cause permanent damage.
The good news is that cleaning your devices does not need to be complicated. With the right supplies and a gentle approach, you can remove everyday dirt safely.
Why You Should Clean Your Electronic Devices
We touch our phones and keyboards many times each day. These surfaces collect oils, dust, food crumbs and other debris.
A dirty keyboard can make typing unpleasant. Smudged screens can affect visibility. Dust may also gather around ports and ventilation openings.
Regular cleaning helps to:
- Remove fingerprints and visible dirt.
- Keep screens clear and easy to read.
- Reduce grime on frequently touched surfaces.
- Prevent dust and crumbs from building up.
- Keep your workspace looking neat.
Cleaning is especially useful if you eat at your desk or share devices with others. However, always follow the manufacturer’s cleaning instructions first.
What You Need Before Cleaning
Gather your supplies before you begin. Using suitable materials helps protect delicate surfaces.
Here is what you may need:
- A clean, soft microfibre cloth.
- A small, soft cleaning brush.
- Manufacturer-approved screen cleaner, if needed.
- Compressed air suitable for electronics, where permitted.
- A second dry microfibre cloth.
Avoid paper towels on delicate screens. Some can leave scratches or lint.
Never spray cleaner directly onto a phone, laptop or keyboard. Liquid can enter openings and damage internal components.
How to Clean Your Phone Without Damaging It
Phones collect fingerprints, oils and dirt throughout the day. Their screens and coatings can be damaged by harsh chemicals or abrasive materials.
Follow these steps for safer cleaning.
Step 1: Turn Off Your Phone
Disconnect charging cables and accessories. Switch off the device before cleaning.
Remove the case if possible. Clean it separately according to its material and care instructions.
Step 2: Wipe the Screen Gently
Use a clean, dry microfibre cloth. Wipe the screen with light, circular movements.
Do not press hard against the display. Excessive pressure may damage the screen or its protective coating.
For stubborn marks, follow your phone manufacturer’s instructions. Some manufacturers permit a small amount of suitable disinfectant on certain surfaces. Others recommend different methods.
Step 3: Clean the Back and Edges
Use the same gentle technique on the phone’s back and sides. Pay attention to areas where your fingers usually rest.
Avoid pushing dirt into buttons, speaker grilles or charging ports. Never pour liquid into these openings.
Step 4: Clean the Phone Case
Phone cases often collect more dirt than the device itself.
Check the case material before cleaning. Many silicone and plastic cases can be wiped with a slightly damp cloth. Leather cases usually need a material-specific cleaner.
Make sure the case is completely dry before putting it back on your phone.
How to Clean a Laptop Safely
Laptops have several delicate parts. These include the screen, keyboard, touchpad and ventilation openings.
A careful cleaning routine helps remove dirt without putting unnecessary pressure on these components.
Step 1: Shut Down and Unplug the Laptop
Turn off your laptop completely. Disconnect the charger and all connected accessories.
If the battery is removable, follow the manufacturer’s instructions before removing it. Never open the laptop just to perform routine surface cleaning.
Step 2: Clean the Screen
Use a clean microfibre cloth to remove dust and fingerprints. Apply gentle pressure and avoid rubbing the same spot aggressively.
If dry wiping is not enough, check the manufacturer’s recommended cleaning method. Use only an approved solution, applied to the cloth if permitted.
Never spray liquid directly onto the screen. Avoid ammonia-based glass cleaners unless the manufacturer specifically approves them.
Step 3: Wipe the Laptop Body
Clean the palm rest, lid and touchpad with a soft cloth.
For stubborn dirt, use a cloth that is only slightly damp, provided the manufacturer allows it. Keep moisture away from seams, ports and buttons.
Allow all surfaces to dry before switching the laptop on again.
Step 4: Remove Dust From Ventilation Areas
Dust can gather around vents and cooling openings. This may restrict airflow over time.
Use a soft brush to remove accessible surface dust. If compressed air is permitted, follow the laptop manufacturer’s instructions.
Do not insert objects into vents. Avoid using a household vacuum directly on delicate components because static electricity may pose a risk.
If the vents are heavily blocked, professional cleaning may be the safer option.
How to Clean a Keyboard Without Causing Damage
Keyboards collect crumbs, dust and oils between their keys. Mechanical and laptop keyboards also require slightly different care.
Use this method for routine cleaning.
Step 1: Disconnect the Keyboard
Turn off the computer and unplug an external keyboard. For wireless models, switch off the keyboard and remove its batteries if the instructions recommend doing so.
Step 2: Remove Loose Dust and Crumbs
Tilt the keyboard gently to let loose debris fall out. Use a soft brush to remove dust around the keys.
Compressed air may help with trapped debris when the keyboard manufacturer permits it. Follow the product directions and avoid excessive pressure.
Step 3: Wipe the Keys
Lightly dampen a microfibre cloth with an approved cleaning solution. The cloth should never be wet enough to drip.
Wipe the tops and sides of the keys gently. Do not allow liquid to collect around key edges.
For hard-to-reach areas, use a soft brush or a suitable cleaning swab. Avoid pulling off keycaps unless the keyboard manufacturer confirms they are removable.
Step 4: Let the Keyboard Dry
Check that the keyboard is completely dry before reconnecting it. This helps prevent moisture-related damage.
If liquid spills into the keyboard, disconnect power immediately where safe. Do not continue using it while wet. Follow the manufacturer’s spill guidance or seek professional help.
Cleaning Mistakes That Can Damage Electronics
Some common cleaning habits can cause more harm than good.
Spraying Cleaner Directly Onto Devices
Liquid can enter charging ports, speakers, seams and keyboard openings. Always apply approved cleaning solutions to a cloth when the manufacturer permits this method.
Using Harsh Household Chemicals
Bleach, abrasive cleaners and unsuitable solvents can damage surfaces. They may also affect protective screen coatings.
Use only products approved for your specific device.
Cleaning With Excessive Pressure
Hard scrubbing can scratch displays and damage delicate components. Gentle wiping is usually enough for everyday dirt.
Using Too Much Water
Even water can cause damage if it enters a device. Keep cloths barely damp when damp cleaning is permitted.
Never submerge electronic devices unless they are specifically designed for that purpose.
Using Heat to Speed Up Drying
Hairdryers and heaters can expose devices to damaging heat. Let cleaned surfaces air-dry naturally before use.
Cleaning While Devices Are Powered On
Leaving devices connected to power increases the risk of electrical damage during cleaning. Shut them down and disconnect cables first.
How Often Should You Clean Your Devices?
Cleaning frequency depends on how often you use your devices and the environment around them.
| Device | Suggested routine |
|---|---|
| Phone screen and exterior | Wipe when visibly dirty |
| Laptop screen | Clean when fingerprints or dust appear |
| Keyboard | Remove loose debris weekly |
| Phone case | Clean regularly, following material guidance |
| Laptop vents | Check periodically for dust buildup |
These are general suggestions, not fixed rules. Shared devices, dusty rooms and frequent food handling may require more regular cleaning.
Should You Use Disinfectant on Phones and Keyboards?
Disinfection and cleaning are not the same. Cleaning removes visible dirt and residue. Disinfection uses an approved product to reduce certain microorganisms.
Not every cleaner is safe for every device. Some products may damage screen coatings or plastic finishes.
Before disinfecting, check the device manufacturer’s guidance. Confirm that the product is suitable for the surface and follow its contact-time instructions.
Never mix cleaning chemicals. Avoid applying disinfectants inside ports, speakers or other openings.
Keep Your Home and Workspace Clean With Alo Maids
Clean electronics are only one part of a tidy workspace. Dust can also settle on desks, shelves, floors and other frequently used surfaces.
A consistent cleaning routine helps keep these areas looking neat. Pay attention to high-touch surfaces and remove dust before it spreads around the room.
For help maintaining a cleaner home or workspace, explore Alo Maids cleaning services. A clean environment can make everyday tasks feel more comfortable.
Final Thoughts
Phones, laptops and keyboards need regular care. The safest approach is simple: switch off devices, use a soft microfibre cloth and avoid excess moisture.
Always check the manufacturer’s cleaning instructions before using a liquid or disinfectant. Never spray products directly onto electronics or use harsh household chemicals without approval.
With a few careful habits, you can remove everyday grime while helping protect your devices from avoidable damage.